Showing posts with label vegetables. Show all posts

Saturday, July 4, 2015

All-American Pasta Salad


This dish is a fresh, cool, simple, make-ahead treasure for summer pot-luck dinners like the one we are attending tonight!

Ingredients:
1 pound Penne pasta
8 ounces smoked Gouda cheese
1 jar diced pimentos
1 jar artichoke hearts
1/2 purple onion
1/2 pint grape tomatoes
1/2 green bell pepper
3 green onions
1 can sliced black olives

Dressing Ingredients:
1 cup mayonnaise
2 tablespoons sweet pickle relish
2 tablespoons red pepper jelly
2-3 tablespoons vinegar
salt and pepper to taste

Instructions:

  • Boil up the pasta to the al dente stage.  Drain, rinse, and set aside to cool.


    • Slice the Gouda cheese wheel in half and cut into pie shaped wedges.

    • Then, dice up those wedges into small bite-sized pieces.
    • Admire it just a bit because it is beautiful, fragrant, and good-a!  
    • Slice half the purple onion and dice the slices up into little yummy pieces. (Save the rest for salads later in the week ahead.)
    • Slice and dice half the green pepper and put the rest in the fridge for another recipe.
    • Pick three beautiful green onions from Mike's garden and wash them up in the sink.  Well, you might want to pick yours from somewhere else but make sure you wash them up somewhere.  Then, snip them up into tiny little pieces. Yep, the whole thing - green and white as well.
    • Drain the black olives in your favorite little colander spoon thingy.
    • Drain, rinse, and chop the artichoke hearts - right in the heart of them.
    • Rinse the grape tomatoes.  It's okay if you eat a couple, too.  Then, slice them in half.
    • Open the jar of diced pimentos and pat yourself on the back that you thought to get the diced ones which will save you a bit of chopping.
    • Plop each of the veggie pieces on top of the al dente pasta in a big old beautiful bowl.  Do it in an arranged way so that the colors look beautiful for a photo.
    • Now mix up a little tangy and sweet dressing for this beautiful concoction.  Start out with a cup of mayonnaise.
    • Add some home-made sweet pickle relish - about two tablespoons.  (If you don't have home-made relish, it will be okay to use some of the bought kind.)
    • Plop in a couple of tablespoons of red pepper jelly to add some tang to it.
    • Pour in a little bit of vinegar - two to three tablespoons.  I used some out of my home-made bread-and-butter pickles so it would have a bit more bite to it.  Then, stir all this together and admire the beautiful little flecks of wonderfulness inside.
    • Sprinkle in some salt and pepper to taste and plop this right smack dab in the center of the bowl of veggies and pasta.
    • Toss everything together making sure to coat all of it with a bit of the yummy dressing.
    • Cover with some clear plastic wrap so you can admire the colorful beauty of it as you set it in the fridge for all the flavors to marry together for a couple of hours or so.  Give it a quick, refreshing toss just before you serve it!
    (It is quite alright if you dish yourself up a spoonful to eat with some left-over chicken livers as a late lunch so long as nobody - well, at least Mike - knows.  After all, somebody has to taste it to make sure it is going to be alright for the pot-luck!)

    Friday, June 21, 2013

    Roasted Brussels Sprouts


    My sister, Brenda, used to call Brussels Sprouts cabbage balls.  I have found over the years that not everybody is a lover of them but Mike and I both really like them prepared in lots of different ways.  The other day I bought some fresh ones in a package at the grocery store and found a recipe similar to this one.

    1 pound fresh Brussels Sprouts
    2 Tablespoons Olive Oil
    3 slices bacon
    1/2 small onion
    salt and pepper to taste


    • Warm oven to 350 degrees.
    • Cut each of the Brussels Sprouts in half.
    • Dice the onion.
    • Place the Sprouts in a sauce pan and steam them for about ten minutes.
    • Toss the steamed Sprouts with the Olive Oil and spread out onto a foil-lined baking sheet.
    • Place in the oven and roast for about 15 minutes.
    • Stir and bake about 15 more minutes.
    • While the Sprouts are baking, fry the bacon in a skillet till crisp.
    • Remove from grease and toss diced onion pieces into about 2 Tablespoons of the grease.
    • Cook till tender.
    • Chop bacon and add Brussels Sprouts and chopped bacon to onions and stir till mixed.  
    • Season to taste and serve.
    Note:  These are also delicious roasted in a grill pan on the grill!

    Tuesday, January 15, 2013

    Chicken Pot Pie


    This is truly a comfort food recipe.  It is delicious and easy, too. 

    Ingredients:
    2 cups chopped chicken
    1 can cream of chicken soup
    1 can peas and carrots
    2 cans mixed vegetables

    Topping Ingredients:

    1 cup self-rising flour
    1 stick butter, melted
    1 cup milk
    • Gather all your ingredients because if you don't do that first, you might find yourself in the middle of preparing and realize, "Oh gosh, I'm out of..." and that is just so frustrating.
    • Spray a casserole dish with non-stick vegetable spray.  I'm using my Pampered Chef Deep Covered Baker but just because it is a good size for this and the crust comes out a nice thickness.  You can use any 9" x 13" baking dish.
    • Drain the liquid into a bowl, pour in your vegetables into the casserole dish, and give them a little stir to mix them together.
    • Since I was using canned chicken chunks, I drained the juices out into the liquid bowl and dumped the chicken into another.  (I have used left-over chicken and that meant I had to add a half-cup or so of chicken broth.)
    • With a fork, break the large chunks up till it is almost like shredded chicken and blend this into the veggies.
    • Blend together the liquids from the veggies and the chicken with the can of soup because that makes the liquid ingredients a nice consistency and so much easier to stir in than that gloppy, clumpy blob of cream soup.

    • Pour the blended liquid mixture over the chicken and veggies and stir it up till it looks like a calico quilt.
    Now it is time to make the topping - better known as that rich, buttery crust!

    • Melt a stick of butter.

    • Add a cup of milk and stir.
    • Add a cup of sifted flour.  I know that pile of flour looks like it wasn't sifted but it was... OK. OK.  I did just dump it into the bowl but it still will turn out just fine... trust me.  Stir all that together to make a creamy batter.
    • Pour that batter on top of your casserole, place it into a 350 degree oven, and bake for sixty to ninety minutes or until the topping turns a golden brown.
    • Let set for a few minutes or you will burn your mouth when you dig in!


    • Doesn't that just look like a golden picture of bubbling wonderfulness?  I hate this isn't one of those scratch-and-sniff blogs because that dish is smelling like a warm cuddle on a cold, shivery day!


    • Scoop some out onto a purty Blue Willow plate and set that on a red gingham placemat and it will be a feast before it even hits yore belly - before it even touches yore tongue.  Whew!  That is some kind of wonderfulness!


    This is one of those one-dish meals that is so buttery and delicious that it is hard to just eat a little bit on a cold day.  I have substituted ground beef or ham for the chicken and had that as the base for the pot pie and they were equally delicious. I've also substituted the cream of chicken soup with cream of celery or mushroom with success.

    Thursday, July 5, 2012

    Breaded Okra


    Ingredients

    fresh okra

    corn meal and flour from your fancy labeled tubs

    buttermilk

    Steps to prepare:

    • Put some CDs into the stereo and turn it up really loud so you can dance around to the music and feel happy while you do this.  Today I picked from the sexy men singers category and listened to folks like Conway, Alan Jackson, Brad Paisley, Trace Atkins, Marvin Gaye, Boys To Men and, of course, the most sexy - George Strait.   (Yes, I still use my old school stereo because I can turn it up really loud and not have to have those iPod ear buds hurting my ears and falling out when I dance around the kitchen.  Has anybody solved this problem with the iPod ear buds?)

    • With a sharp knife cut the ends off the okra and discard.  Then, cut the okra into bite-sized pieces.
    • Pour just enough buttermilk into bowl to coat the okra slices.  (I'm still amazed that I could do this and make a picture of it at the same time!)
    • Combine about one cup of cornmeal and three tablespoons of flour in a gallon plastic zipper bag.  (I usually sneak and add some salt, pepper, and Cajun seasoning into the mix as well.)  I forgot to take a photo of this step so just envision this part.

    • Get out your favorite old spoon with slots (that came with the Fry Baby you used in college more than 20 more than 30 ahem... many years ago) and gently stir the okra to coat it thoroughly. 
    • Then, begin lifting and draining it and place it into the plastic bag holding a combination of flour and cornmeal.  (I usually shake this around a bit and then add spoonful after spoonful and shake a little between each addition.)
    • Close the zipper bag tightly (or you will have a dusty, gritty kitchen where the ceiling fan blows the cornmeal/flour mix around).  Shake bag vigorously like the little girl did in the Shake-n-Bake commercials and say, "And I hay-elped."  (Don't tell me you don't know what I'm talking about because it will make me feel depressed that I am so old and you are young and spry.)
    • Take out the grungy old cookie sheets that you almost threw away when you married and moved into your husband's house because they looked so terrible but he talked you into keeping them because they would be good for something.  Line these cookie sheets (that you are thankful you have) with a sheet of wax paper.
    • Wash your favorite, old, slotted spoon and dry it well because it is the only one like it that you have and it works perfectly for this step.  Use it to carefully lift the okra out of the bag and place on the wax paper in a single layer. 
    I took two shots of this because somehow on my fancy inexpensive camera the settings got changed while I was trying to do all these things and take photos at the same time.  The one above is with a flash and the one below has no flash.  Which one do you think looks more appealing?
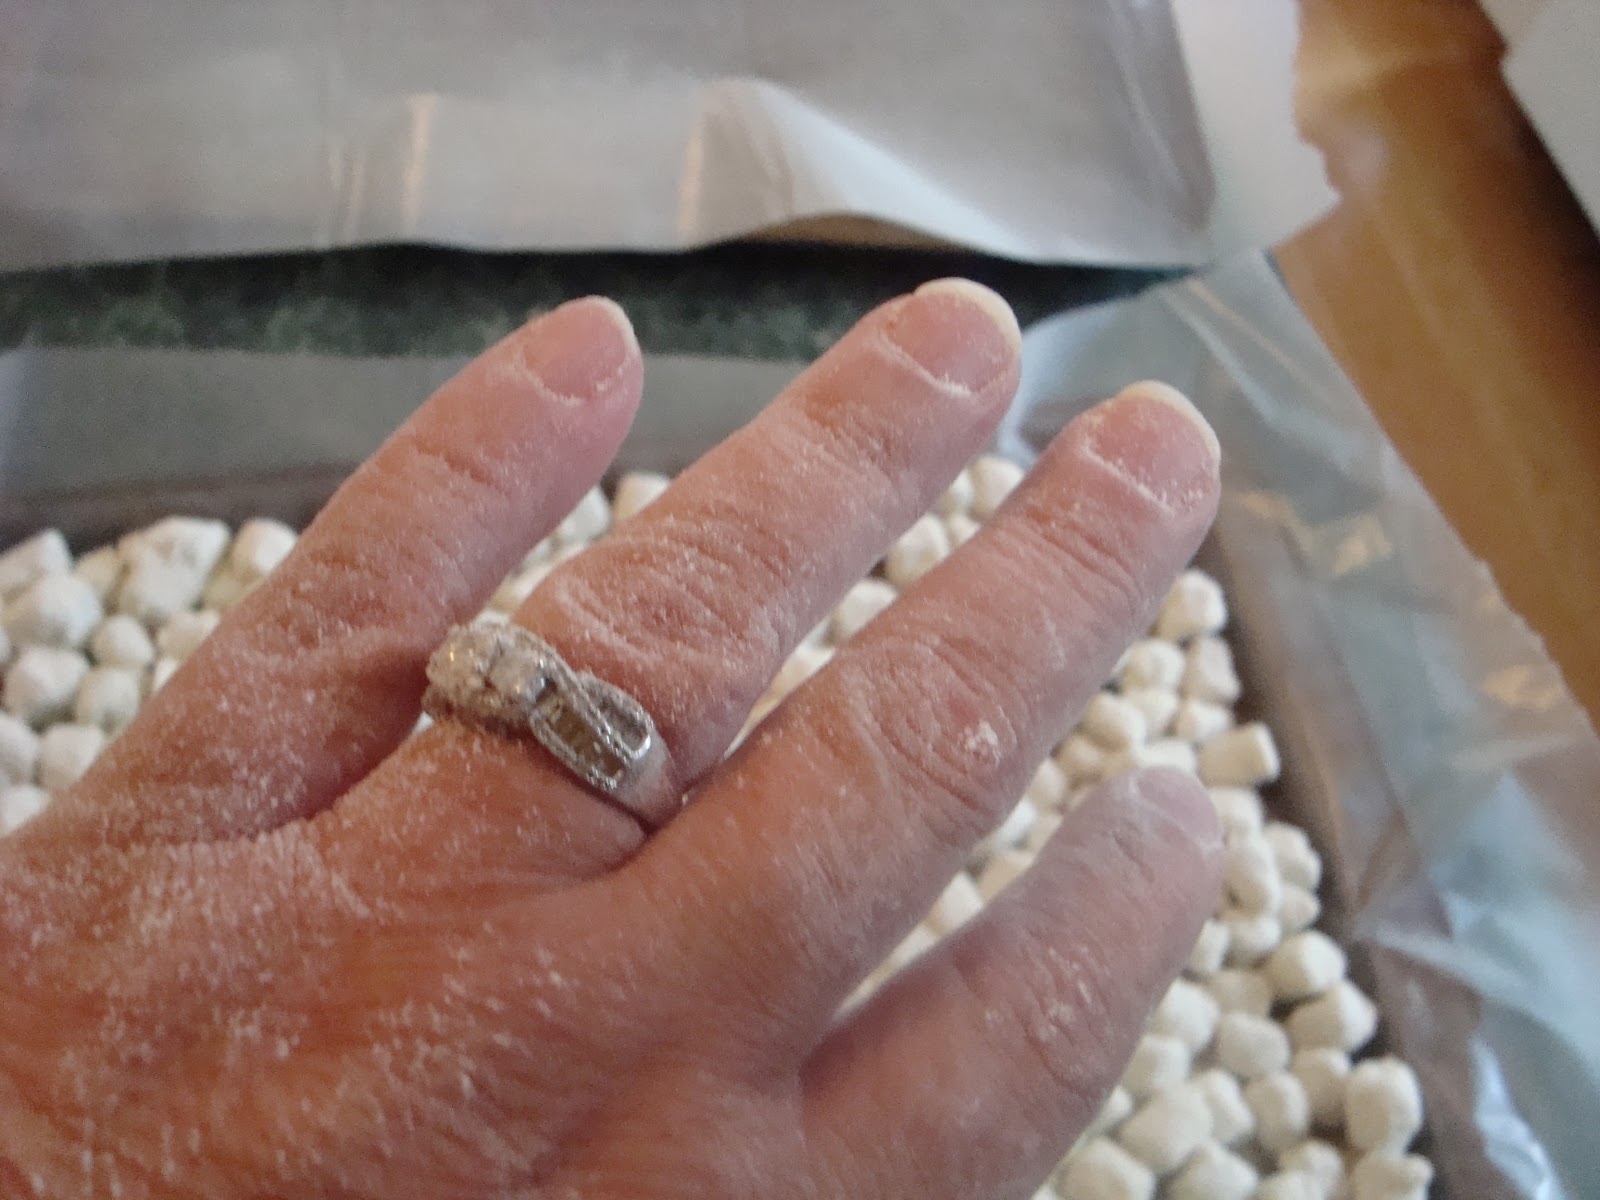
    • Or you could just use your hand and get your pretty wedding ring all gritty and grungy.

    • Place the pan of breaded okra in the freezer for at least 24 hours until it freezes through.  Then, put the frozen okra into freezer bags and label them so you will know exactly what it is and when you froze it and won't have to stand there wondering in a couple of months which bags are the older ones that you should cook first.

    • When the weather gets cold and you want to be reminded of these sweltering, stifling, arid days of summer, simply open a bag of this delicacy and (get your hubby to) drop the delicious nuggets into his deep fryer.  You also could fill a skillet with vegetable oil and heat it to very hot and fry it till it is golden brown.  Then, using your favorite, multi-purpose, slotted spoon lift the okra out and place it into a bowl lined with paper towels to absorb the excess grease.  Serve hot and enjoy this southern treat!
    P.S. If you have some squash that is a bit too mature and you tried to tell your husband to throw it away but he said it would be good battered and fried, you could slice up the smaller parts of it and bread it and freeze it the same way and it will be delicious prepared just like the okra!

    sliced squash pieces
    buttermilk coated squash

    squash layered on wax paper/cookie sheet ready to freeze